One of the best features of the Lego is that you can create the product or item of your liking. And if you want to make a Lego car and you don’t have the slightest idea that How to make a Lego car? Then let me give you a quick review that this article is going to explain the best and easy way of creating a Lego car.
Visit: https://gameofbricks.eu/blogs/news/lego-christmas-gifts
Pieces required for the Lego Car:
If you are making your first ever Lego car then the first step which you need to be sure of is the availability of the pieces before making one. For the most basic Lego car, you will require four wheels of the same size, same sized two axles, and at least one long plate to connect the pieces.
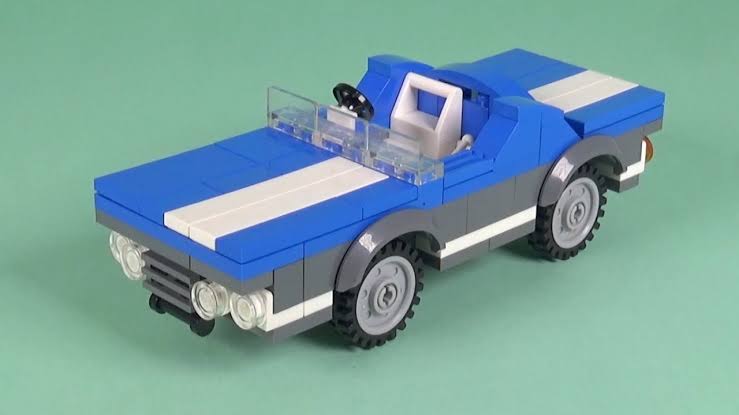
Step by step guidelines for making Lego car:
To make the simplest Lego car to need to follow the following steps.
- Alignment of base and wheels:
In this step, the axial and wheel are aligned with the base of the car. To do so to need to pass the axial through the rim piece hole and repeat this step for each axial alignment.
Now you will have two axials in total with two wheels on each side. To align the wheels accurately you have to underside 4×12 base from the end and on the second row. After doing this correctly repeat the similar steps for the second one.
- Front end of Car:
Now to give the angles front to the car you need to align two angular pieces with 2×2 brick and then interconnect them to the front base. The 2×2 bricks should also be two. Now you need to do the same for another set of 2×2 bricks and angular pieces and after doing this you just simply align them together.
- Windshields:
Windshields are also available on the Lego brick sets of cars. You can just simply align these in the front of your angular bodied of the car which you have made previously. After completing this step, the car front must look like the original ones.
- Seats:
Driving seats just makes the cars look more realistic. To create the seats, you need to align the 2×4 brick as the seat base. Now add the 1×2 on each side of the brick-making it more seat-like. Now that you have made a total of 2×2 car interior. You can add the side windows also and the steering wheels on the windshield which is 2×4.
Also visit: https://jhaulage.co.uk/
- Back of the Car:
Now to create the whole look add two 2×4 bricks heaped on each other. After that add 1×4 on top of this heap. To make the spoiler effect you can add a 2×4 plate on top of 1×4 brick looking like it’s hanging on the back of the car. After completing that just add this to the interior extension’s back.
If you follow the above steps, you can easily get all the answers to How to make a Lego car?